Wednesday, March 28, 2012

Aircraft Assault!!

FFG has released the rules for Aircraft from the upcoming expansion Operation "Zverograd". They can ignore all terrain, see almost any unit, but cannot perform sustained attacks! These are just some of the highlights this new unit type, and I cannot wait to see them in action!! Check out the article here, and enjoy the pic's of the SSU Aircraft!


Tuesday, March 27, 2012

Answers from FFG and FAQ!

I received my response from FFG from the questions I asked in March. I also sent another question between then and now. I find the flame weapon vs. height to be intriguing and look forward to utilizing it in future battles. Also here is a link to the new Dust Tactics FAQ.

Enjoy!

You recently asked some questions about Dust Tactics:

Rule Question:
This is a clarification regarding a Heroes skills and the Stim Pack Skill.

Can the Heroic Attack Skill be used when Ozz 117 & his squad are "standing up" after being injected with the Stim Pack.

Example:

Ozz 117 & a his Tank Busters were injected with a Stim Pack earlier in the round. Now that they are activated, they perform a move-move for the first activation, and a sustained attack for the second activation. After the attack the play lays the miniatures down. After winning the initiative on a new round, the same player chooses to immediately stand Ozz 117 & his Tank Busters up, while using Ozz 117's Heroic Attack Skill to help keep them alive until they can activate in the next round.

Is that a valid example? The Heroic Attack Skill states that it only requires the Hero to activate in order to use the skill, and does not cost an action or require anything else of the Hero/Squad. 

Your example is valid. The Heroic Attack skill may be used to protect a squad during the turn in which they are recovering from a Stimulant Kit injection.


Alternately, is Bazooka Joe's "Black Op's" skill negated for the turn if he is exhausted from a stim pack injection?

Bazooka Joe's Black Ops skill is not negated if he is exhausted from a Stimulant Kit injection.
I hope this has answered your questions. Happy Gaming!
And for the original questions:

First of all, I'd like to say thank you for waiting so patiently. We've been busy updating the Dust Tactics FAQ, which includes updates directly related to your questions, and we wanted to make sure that you received the most accurate answers possible.

You recently asked some questions about Dust Tactics:

Rule Question:
Greetings! I have a few questions after my last league play night and using the Heavy Walkers and structures for the first time, as well as a few others that have been in the back of my mind.
Flame weapons vs. multi-level structure
When the Hot Dog or Fireball attack units in a structure how does the"fire arc" work?

When a flame weapon is used against a target that is at a higher elevation inside a multilevel structure, the target's space is the only space that can be targeted. Since the flame is shot in a line up and towards the target at an angle, it does not pass through any other spaces. However, upon reaching the target, if there is any remaining range, it would be possible to reach additional target-able units that are on the same level.

According to the established rules the flame weapon can inflict damage on all units in spaces between the attacking unit and the target unit. The Hot Dog has a range of 2, and if adjacent to a multilevel structure only needs a range of 2 to reach the roof. If the Hot Dog targets a unit on the roof does the flame weapon only affect the units on the roof and 3rd floor, since that would require a range of 2 and would be 2 adjacent spaces?

If a Hot Dog adjacent to a structure targets a unit on the roof, the flame weapon can only affect units on the roof. The Hot Dog could target the unit on the roof or the unit on the 3rd floor, but not both. (note: p. 14 of the Operation Cerberus Campaign Book: "Units that are on separate floors and directly above or below each other are not considered to be adjacent")

Or would the flame weapon also hit all the other floors?

The flame weapon would only strike targets on a single floor.

Or can the Hot Dog only target the ground floor and floor above?

The Hot Dog could target the ground floor or the floor above, but not both.

The Fireball has a range of 3, and can be adjacent to 2 squares of the structure. So pretty much the same question, but with a range of 3, the possibility of "dancing" diagonally up the building since LOS and Range requirements would be met. Such as: The Fireball is adjacent to 2 openings on a 3 story structure (1st, 2nd, 3rd, Rooftop for a total of a height of 4). There is a unit on the right of the fireball on the 1st floor, left of the fireball on the 2nd floor, and then right on the 3rd floor and rooftop (4 targets in total). Can the Fireball target the units on the first 3 floors since it meets the range of 3, and does not break LOS? Same for the targets on the 2nd, 3rd, and 4th floor? Or can I only target 1 section of a multilevel structure and it affects all units or 3 stores of that section?
Sorry if that was confusing, but I saw so many possibilities with only need a 2 range to reach the roof. I couldn't find a way to make an image to help explain what I was shooting for with the materials at my disposal.

The flame weapon can only strike multiple targets if they are within range/LOS and on the same floor.

Do units on the roof follow "structure" rules for LOS, since they are not considered to be in the structure? So basically, does the unit have to be on the side of the roof facing the attacker (like inside a structure and on an exit facing the enemy), or, since the unit is not technically in the structure, can they be targeted anywhere on the roof as long as there is 2D LOS?

Units on the roof are not considered to be inside the structure, so diagonal line of sight is not blocked. However, the unit has to be on the side of the roof facing the attacker for line of sight to be established. If they are farther back on the roof from the attacker, the attacker does not have line of sight, and vice versa.


Can units with the Jump ability jump off the roof of a structure? It's clear they cannot land on the roof, but not so much about jumping off the roof.

Units with Jump can jump off the roof of a structure.

Is placing its own action that can't be combined with any other skills or actions? The most I can find is in the Original Core Set rulebook saying that placing on the board is always a "one space move action." Hopefully these follow up questions will allow this to make a bit more sense:

According to the updated FAQ, "When entering the battlefield during the first round of the game, each unit’s first action must be a MOVE action, using movement points to enter one of the entry spaces on the map as per that unit’s movement rules. The unit is not restricted to a move of one space if it has more movement points available to it." Additionally, any skills that affect movement (such as Fast or Scout) can be applied to the MOVE action used to enter the battlefield.

รข?¢ So units with move 2 can only have the 1 space on placement, correct? 

According to the updated FAQ, units with a movement value of 2 may move their full distance on the MOVE action used to enter the battlefield.

Can the Fireball use its scout ability to save its second action to perform an attack, or does the scout ability apply after both actions are finished? So basically it could it be possible to perform a Placement+ Scout for the 1st action, and attack for the 2nd action?

The Scout ability should be applied to a MOVE action in the same way as the Fast ability. The Scout ability would go into effect as part of a MOVE action taken by the unit during its first activation of the game. It is entirely possible to enter the battlefield with a MOVE action to which Scout is applied, and to then make an ATTACK action. (MOVE+Scout --> ATTACK = possible)

Can units with Fast use their fast ability when placing?

Yes.

Such as Placement+Fast for the first action, and attack for the second action?

It is possible to enter the battlefield with a MOVE action to which Fast is applied. The unit may then make an ATTACK action as its second action.

Same with Charge. Can Markus and the Gorillas perform a Place/move/fast/charge?

Because the a unit's first action is now officially a MOVE action, it is possible to enter the battlefield with a MOVE action to which the Charge ability is applied.


Are the Rubble Tiles in the Original Core Set supposed to have a '+' icon? Are any of these tiles supposed to be released in an expansion? The terrain type was announced in Operation Cyclone over a year ago and I have yet to see any tiles with this marking and am anxious to give them a try.

The rubble tiles currently have no icon and should be considered impassible. Feel free, however, to apply your own house rules to the tiles, and treat them as though the + icon were on them.

I hope this has answered your questions. Happy Gaming!

Monday, March 26, 2012

Dust Tactics Game Night!! 03-25-2012

This week saw only 3 of us show up at Knightfall Games for league play. Some of us fell ill, and we hope you all get well, and others were just not able to attend. Jiltedtoo, Ed (new player from 2 weeks ago), and myself were on hand to play test some Olympia Dust Day armies and scenario's. We each needed to find a 250 point army that we felt were up to the task of handling all 3 scenarios for the Golden Hot Dog Open! Click here for more event details!

So we played the 1st Scenario 3 times, each time with a modified army, and ran through the 3rd Scenario once. I will list the armies, results, and make comments about each game as best I can. I was more focused on my army and play testing than picture taking, so we have only a few pictures for this weeks blog.

The Game Map we used for the play testing. We now know the 1st and 3rd scenario will contain a central 1 story structure.

First up was myself and Ed. I was Allies and Ed took a swing at the Axis, with Jiltedtoo available for support and clarification. The objective of the 1st scenario is to try and escape off your opponents edge. Double points scored for any escaped units, and regular points for any kills.
  • The Allied 250 point Army:
    The Boss Squad - Corps Officers - Ozz 117 - Grim Reapers - Bazooka Joe - BBQ Rangers - The Priest - Hell Boys - Crack Shots - Crack Shots - 13 Foxtrot
  • The Axis 250 point Army:
    Markus - Axis Gorillas - Hans - Heinrich - Manfred - Tank Killers - Stefan - Sturmpionere - Sigrid Von Thaler - Laser Grenadiers - Heavy Recon Grenadiers
This was a very, very close battle. In the end the Allied forces scored 268 points, and the Axis forces scored 258 points. Using the Stim Pack skill, the Allied forces chose to shoot Ozz 117 and his Grim Reapers off the board. Unfortunately Markus and his Gorillas were able to make contact before they were able to activate, so the Grim Reapers were eliminated, and a heavily wounded Ozz barely made it off the map alive, but still scored 48 points for the escape! The Priest and his Hell Boys with Joe and his BBQ Rangers attempted to charge up the right side of the battle field, only to have the Heavy Recon Grenadiers and Hans Light Walker thwart their efforts and eliminate both Heroes and units early on in the game. Markus and the Gorillas, Manfred and the Tank Killers, and Stefan with his Sturmpionere squad made a run up the left side of the map. The Crack Shots were able to score a couple of kills on the Sturmpionere's, eliminating the flamwerfer and 2 STG 47's. It looked to be over for the Allied forces early on, as by turn 4 all 3 Heroes and their squads I just listed were in range to escape in the next turn. So the Boss Squad took a chance and brought back the Hell Boys!! Thanks to the new entry rules, they were able to place + use their fast skill to get within range of 2 of the squads and nearly eliminate them both. Markus barely escaped after all his Gorillas were eliminated, and Stefan and his Sturmpionere's didn't stand much of a chance after the losses they already sustained. Eventually the Corps Officers, 1 team of Crack Shots, 13 Foxtrot, and the reinforced Hell Boys were eliminated, but not before Sigrid & her Laser Grenadiers and Markus were eliminated! In the end the Allied forces were able to escape the last team of Crack Shots, and the Axis army was able to get their Hans off the board as well.


Second up was Jiltedtoo against myself. I was still Allies, and Jilted was Axis. Same scenario as above.

  • The Allied 250 point Army:
    The Boss Squad - Corps Officers - Ozz 117 - Grim Reapers - Bazooka Joe - Hell Boys - Johnny One Eye - Gunner Rangers - Bot Hunters - Recon Rangers
  • The Axis 250 point Army:
    Kommandotrupp - Heinrich - Hans - Totenmeister - Grenadier X - Axis Zombies - Axis Zombies - Stefan - Sturmpionere - Beobachters
This game ended up being much different from the first. In the end the Axis scored 509 points, while the Allied forces were only able to come up with 243 points. The game looked very good for the Allies early on! Another round of Stim Packs on Ozz 117 and his Grim Reapers proved a bit more fruitful. With the use of the Heroic Attack Skill, the unit was able to perform a double move for the first activation, then an Attack on Stefan and his Sturmpionere's and Move to escape for the second activation. The unit made short work of its targets, scoring a full kill before moving off the board. That's 145 points for the Allies before the end of the second turn! However things soon turned very bleak as the Heinrich, Zombies, and their Heroes plowed their way through the Allied forces with ease. Joe was lost early on, but his sacrifice helped the last of the Hell Boys to escape off the map, and the Allied forces even managed to get the Recon Rangers of the board as well for double points. Johnny and his Gunner Rangers, as well as the Bot Hunters, didn't get a chance to do much since the Zombies quickly closed the distance with their Assault ability and laid waste to both units, with Totenmeister and the other zombies coming in behind to mop up any stragglers. Before their escape they also made sure to finish off The Boss Squad and NCO Command Squad. All in all the Axis was able to escape both Hero/Zombie units (110 points each!!!) as well as the Beobacthers and Hans. At this point Ed had to leave us, but very much enjoyed seeing these new units in play!


Third game was the same match up and scenario as the second, but with modified armies.
  • The Allied 250 point Army:
    The Boss Squad - Corps Officers - Ozz 117 - Grim Reapers - Bazooka Joe - Hell Boys - Wildfire - Wildfire - Crack Shots - Crack Shots - 13 Foxtrot
  • The Axis 249 point Army:
    Kommandotrupp - Heinrich - Hans - Totenmeister - Grenadier X - Axis Zombies - Axis Zombies - Markus - Axis Gorillas - Beobachters
The Allies did better this time around, but not much... The score at the end was Axis forces at 557 points, and the Allies at 279 points. The Allied forces used the same tactics with the Stim Pack and moving Ozz 117 and his Grim Reapers off the board for the early double points. After that things fell apart quickly, but the Allied forces made sure to try and keep both Command Squads safe this time around. The Axis were pretty much able to eliminate all the Allied forces, and the Hell Boys twice after the Boss Squad brought them back to the party. The only units the Allied forces were able to kill in the entire game is Totenmeister, and that's it. Granted the Allies were able to move what was left of both the Boss Squad and Corps Officers off the board for double points, but it just wasn't enough to gain a victory points wise. Markus and the Gorillas made a hasty exit as well, scoring double points! The Wildfire's fell quickly to the Zombie Heroes and Squads, mainly due to poor rolls, though the kill shot on Totenmeister did come from a reactive fire from a Wildfire, who was able to roll all hits!!! (that's 6 in total). Everything else for the Axis, aside from the Heinrich was able to escape before turn 8, giving the Axis very much in the form of double points!!

A shot just before the Corps Officers escape. Damn those Zombies!!! Ha ha ha


The 4th and Final game, was Jiltedtoo and myself giving the 3rd scenario a shot. The object of this scenario was to place a diplomat marker in a single squad and keep that diplomat safe! (we used Heroes from the enemies army to make it a bit more visual of where the diplomaat was). If a player is able to eliminate the squad with the diplomat, they score triple points!!!
  • The Allied 250 point Army:
    The Boss Squad - Corps Officers - Ozz 117 - Grim Reapers - Bazooka Joe - BBQ Rangers - The Priest - Hell Boys - Crack Shots - Crack Shots - 13 Foxtrot
  • The Axis 249 point Army:
    Kommandotrupp - Heinrich - Hans - Totenmeister - Grenadier X - Axis Zombies - Axis Zombies - Markus - Axis Gorillas - Beobachters
This was a fun game!! Each player chose to have their diplomat in with their armor 2 Command Squad. I did consider putting the diplomat in with 13 Foxtrot, to keep the points down to a minimum, but felt the lack of hits and the range of the Heinrich would have added too much risk to the grouping. The Allied forces took a risk early on by injecting The Priest and Hell Boys with the Stim Pack, and holding off on their activation to see how the Axis would attempt to defend their line. Luckily, for the Allies, Grenadier X and his Zombies fell back to help protect the Kommandotrupp, but in the process left a direct path to the Kommandotrupp and diplomat! The Priest made very good use of his Agile nature, and with the Hellboys, performed a double move in the first activation, moving diagonally each time, and in the second action performed a move+fast and attack with all weapons on the Kommandotrupp to ensure it's destruction! They made very short work of the target, and scored triple points for it's elimination (120 points! Boo Ya!!). Granted, in the next round Grenadier X and his Zombies made short work of The Priest and Hell Boys, but the sacrifice was well worth the reward!! The Crack Shots did a good job of eliminating basic Gorillas and Zombies as the units approached the Allied forces. The Smoke Mortar also came in handy to create some breathing room from the Heinrich and allow for some team work against the Axis forces. The next to fall were the Crack Shots to Markus and his Gorillas, but they were able to score hits in Close Combat as well and ended up eliminating the remaining Gorilla, and soon after Markus fell too! Joe and his BBQ Rangers were also able to score a kill on the Hans, after getting lucky with some Demo Charges! Totenmeister and her Zombies were the next to go, after a heated exchange with Joe and his BBQ Rangers, though they were lost in the exchange as well (another case of a close combat double elimination!!). The Crack Shots and 13 Foxtrot moved into a prime position to keep Grenadier X and his Zombies from making a deadly Assault on The Boss Squad, but lost their lives in the process. Ozz 117 and his Grim Reapers were taking a lot of damage, as well as dishing out their fair share. After getting healed up by The Boss Squad and NCO Command Squad, they made short work of the remaining forces quickly eliminating the Beobachter's as well as Grenadier X and his Zombies by double teaming them with sustained fire and setting them ablaze with Ozz's flamethrower, and finishing them off with the brutal Victory MG Duals!! At the end of turn 8 All the Axis had left was their Heinrich. The Allied forces were still strong with Ozz 117 and his Grim Reapers, The Boss Squad, and Corps Officers. The final score was Allied forces with 292 points, and the Axis forces with 125 points. I had a lot of fun with this scenario, and am really starting to like the NCO Command Squad and their abilities. It was great to finally get some playing time with them! I don't know if I'll keep them in the Army for Dust Day, but I have a hard time justifying why I should leave them out. Here are some pictures, mainly of The Priest and the Hell Boys after their Stim Pack destruction of the Axis Kommandotrupp!

The Priest and Hell Boys started behind the double Terrain Tile piece on the right hand side next to Ozz 117 and his Grim Reapers... That Agile skill comes in very handy!!

And a shot of them after destroying their target and falling down exhausted!


We had a lot of fun, and it was kind of nice to have a quiet and relaxing game night where we could do some play testing and really explore these newly clarified rules and units I haven't had much playing time with. We will be back at Knightfall Games this Sunday, and then a 2 week break for Easter and Dust Day Olympia!

Good Gaming!!!

Tuesday, March 20, 2012

Dust Tactics Game Night!! 03-18-2012

This week we met up and played at Red Castle Games. This was a fantastic venue with at least 5 tables big enough for a 4x6 map and troughs on the edge to place your units and dice. Lots of parking and an awesome staff who were very accommodating to our group! We even managed to entice a WH40K player to play a demo with a small army. Thanks for your interest Tony and we look forward to your addition to our group!

In addition the father and son combo from our Guardian Games event two weeks ago, Stuart and Austin, surprised us with their attendance. Not only did they enjoy their experience from that demo, they went back to Guardian Games and bought a Revised Core Set, Hero Pack (both), Medium and Heavy Walkers, and much more!

We had a bigger group than anticipated, so there is not a whole lot to the battle reports, but we took many pictures and I'll definitely run down some of the highlights. So, after discussing some options for the league we are organizing, I played a 130 Point army demo battle with Austin to help clarify some game play and rule questions. Major Headcase also played a demo with our new friend Tony using the same army and map after we finished our game.

The Allied Army I took into battle was:
The Priest + BBQ Squad
Bazooka Joe + BBQ Squad
Wildfire
Crackshots

The Axis Army Austin took into battles was:
Ludwig
Recon Grenadiers
Heavy Laser Grenadiers
Sigrid Von Thaler + Laser Grenadiers

There are no pictures of the game I played with Austin, but it was a good battle with a victory for the Allies. The Wildfire was able to position itself away from the Ludwig and did some damage to Sigrid and her squad, as well as the Heavy Laser Grenadiers. It was eventually eliminated by the Heavy Laser's, but not before it did it's fair share of damage. Joe and the BBQ Rangers also did well as they were able to bypass the Recon Grenadiers and get in close to the Ludwig for the kill. Sigrid and her squad did their fair share of damage to The Priest and his squad, but the Crackshots were able to help eliminate a wounded Sigrid, as well as clean up the rest of the Laser Grenadiers. I don't recall how the Recon Grenadiers bit the Dust, but it may have involved lots of fire and shotguns...

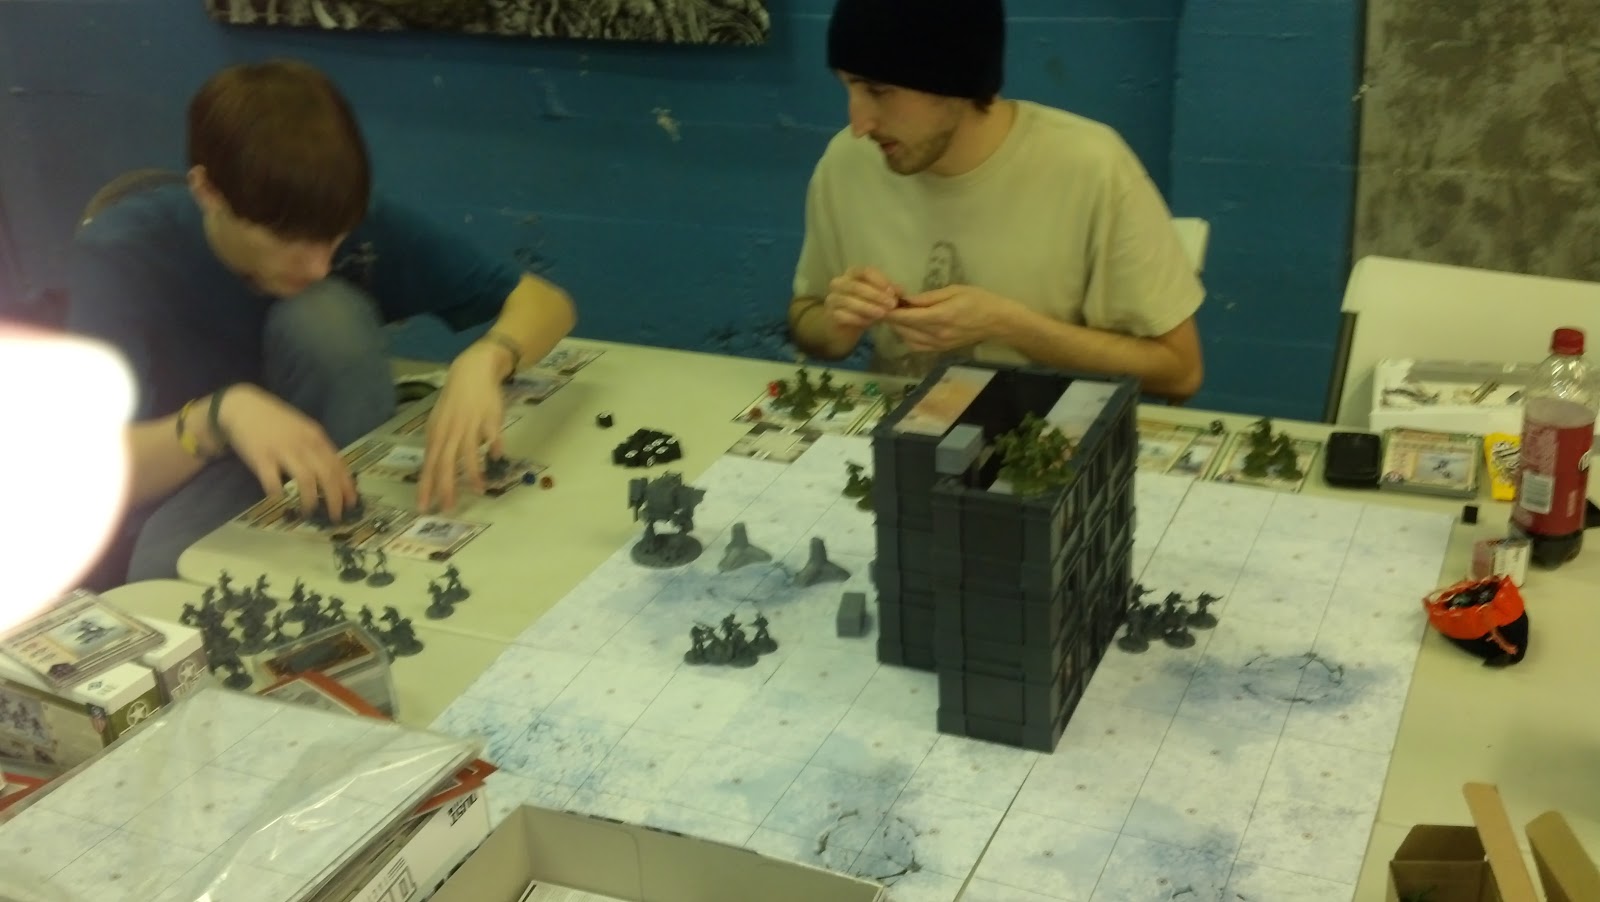
Below are the pictures Headcase and Tony played using the same armies. The Wildfire scored an early kill on the Heavy Laser Grenadiers. The Ludwig was placed in prime firing position on The Priest and his squad, but they were able to escape LOS before any losses were sustained. Sigrid and her squad also did some serious damage to Joe and his squad, but ultimately Joe and a couple BBQ Rangers were able to pull through the battle. The Priest and his squad were able to take out the Ludwig, after sustaining a few losses. It came down to a few of the Recon Grenadiers vs. the Crackshots, Wildfire, and The Priest and Joe, who only had a surviving BBQ Ranger or two each. The Recon Grenadiers did a fine job going out in a blaze of glory by of finishing off the Priest and his BBQ Rangers with their STG 47's, eliminating the Crackshots with Close Combat, and scoring 2 hits on the Wildfire!


Joe and his BBQ Rangers deal some damage to Sigrid and her Laser Grenadiers


End of Game Picture

During Headcase and Tony's demo, Jiltedtoo and Stuart played a game out of the Victory Bridge scenario book. Jiltedtoo, our Axis regular, opted to play the Allies, while Stuart played the Axis. I tried my best to check in on this game, but didn't get too much information. I know that Jilted make the comment that the Blackhawk would be one hell of a light walker if it had a range of 3, which I have to agree with. Ultimately the Axis prevailed as the Allies took a chance that pretty much sealed their doom as a Hero and the Hell Boys made a valiant effort in an attack, and out of about 20 dice, only rolled a single hit.


The next game was a "play-test" of sorts for Jiltedtoo's campaign idea. It was a 4x6 map and is the beginning of an Allied attack on an Axis city. The Axis player comes into the map from the bottom 3 tiles on the left had side (from the Axis players perspective), and can place anywhere in those 3 tiles. The Allies enter the field along the entire 4 tile edge on the opposite side of the map. There is 1 structure in between the city line and the Allied entry zone. The Allied player is to have at least 1 unit in the Axis deployment zone by the end of turn 10 to gain the victory. 

It is the first portion of an 8 player campaign idea (4 Allied vs 4 Axis) where the Allies must invade an Axis city to save a squad of Red Devils who have obtained very valuable information. The Allies attack from all sides, so there would be 4 different battles at the beginning, then *hopefully* two battles in the second portion of the campaign, then 1 final battle with all 8 players, provided all the Allied players were able to achieve all their objectives in all their 2 previous battles. The idea is that the Axis player must retreat into the city to join with it's other forces in the middle of the city, but is trying to cause as much damage as possible to the incoming force. The Allied player must win in order for their portion of the campaign to continue. Whatever survives of both armies would then be carried into the next scenario, with the Allies getting 100 points to refresh their existing units (not to purchase new units), while the Axis would get roughly 50 points to do the same. Also, if the Allies manage to win the scenario, any Axis unit still left on the board at the end of turn 10 are considered lost to the Axis player. So if it's not off the board by the end of turn 10, it's gone for the rest of the campaign. It might sound a little confusing, but we will have the campaign document posted soon for all to see.

The Armies were Austin and Jiltedtoo each had their own Axis army at 175 points each, and Headcase and I played as the Allies with each of using bringing a 200 point army to the battle,. Though the armies are "separate" and each player rolls their own initiative, they would still work as a team so each army was still limited to all unit restrictions.

The Game Map, from the Axis perspective. They would enter on the bottom 3 tiles on the left hand side. So not the tip of the building on the left, only the bottom row of the structure in the middle, and nowhere in our in front of the structure on the right.


All in all a very interesting game... The shortest distance to cover with no feasible form of valuable cover or tiles that block all LOS was 6 spaces... With Artillery ignoring all cover (which I still call bullshit on), minus structure cover, it was very difficult for the Allies to get any type of advantage for the approach. They could hide behind tank traps to avoid the Beobachters, but then the Heinrich and Luther would have clear and sustainable shots. Granted the Allies could have developed a better strategy, but without enough units to absorb the hits there was no way to even approach the objective without it being a suicide mission. A heavy walker would have been very useful for this mission, but I was trying to keep in mind that the army would carry on into the next battle, and the next battle would be tighter quarters, so a heavy might not have been the best choice in the long run... Which brings me to the other side of the play test... It wasn't really a play test, because the Axis were playing to win, not defend. There was no regard for the fact that any units lost would not be carried over to the next round, and very few points would be available to replace said units. Yeah, by the end of turn 7 the Allies did a fair share of damage, but there was still no way to reach the objective in the final 3 turns without each action being a double move for every unit, and even further, there was not enough units left to eliminate what remained of the Axis forces.

I really like this idea for a campaign, and look forward to the finished product. All in all, the consensus of the Allied players were that there needs to be a larger force for the Allies (especially if there will not be any additions of tiles that block all LOS), and the addition of tiles that block all LOS. The Allied players did disagree on the degree of the consensus as much of it does have to do with the units and strategy, but there is nothing the Allies can do to fend off attacks coming from Artillery, Angela and her Snipers, and that damn unlimited range Heinrich with those other unlimited range walkers, and cross a minimum of 6 spaces and a maximum of 13 spaces with no real avenue of approach or cover. Also, there were maybe 4 or 5 squares in the entire Allied deployment zone and second row of tiles in front of the deployment zone that the Axis didn't have the option of obtaining LOS to upon placing their own units.


Here are some random picks of Pegasus 3D terrain that fit's well onto the Dust Game Tiles, and all of our stuff that we need to cart our units around in since we many of us have yet to purchase or build carrying cases.

Pegasus Cathedral for Major Headcase's campaign idea!

The Boxes on the left belong to me, where the bags on the right belong to Stuart and Austin. They look empty, but that's because they placed their stuff on a third table (to the left), of which I did not take a picture :-)

We are back at Knightfall Games this Sunday for our regular game night. Hope to see more players this attend and our group grow even more!

Good Gaming!!

Monday, March 12, 2012

Dust Tactics Game Night! 03-11-2012


A very successful game night at Knightfall Games!! The blog won't be too long, but I take that as a good thing since we had 2 new people to introduce to the game! I do have some picks and will highlight some points in the great team game we had.

We started out or event with having our new players, Ed and Skylar, play nothing other than the first scenario of Operation Blue Thunder, Reconnaissance. Always a good scenario to introduce the game, and we added the Heroes, Joe and Sigrid. Ed took the Death Dealers, BBQ Rangers, and a Hot Dog. Skylar took the Laser Grenadiers, Battle Grenadiers, and Luther. The game really came down to the roll of the dice with the brutal elimination of the BBQ Rangers on the first attack. The Hot Dog took care of the Battle Grenadiers, but the Luther was too much, and with only the M9 Bazooka of the Death Dealers remaining it was a clear victory for the Axis.

Our second game and map were devised by Major Headcase. 2 Allied and 2 Axis players working as a team (1 initiative roll per team, and 1 unique unit per team), but each player having 160 points available to spend on their forces (totaling 320 points per team). The Teams were Skylar and Headcase as the Axis, with Ed and myself as the Allies

**Special Note: Our group usually plays with Artillery Fire ignoring only cover that comes from "direction", such as corner cover, and cover provided by rooftops. Things like tank traps, ammo crates, rubble, forest, etc... still apply cover. We can see the argument that it's a parabolic trajectory and ignores cover provided by "direction", but not a single one of us can make any sense of why it ignores all cover, except cover from structures. Rubble, trees, tank traps, etc... are perfectly capable of absorbing that damage as well.**

The Game Map:


Shot of the Map at the end of the first turn.
All units placed:

Axis Army:
Ludwig - Heavy Laser Grenadiers - Hermann - Recon Grenadiers - Luther - Heinrich - Heavy Flak Grenadiers - Sniper Grenadiers - Sigrid & Laser Grenadiers - Lara and Heavy Recon Grenadiers
Allied Army:
Joe & Death Dealers - Pounder - 13 Foxtrot - Steel Rain - Corps Officers - Wildfire - Ozz 117 & Grim Reapers - Boss Squad - Johnny One Eye & BBQ Rangers

The game was pretty touch and go at first with Ozz & The Grim Reapers keeping the Snipers, Lara's squad, and Sigrid's squad at bay, with Johnny & the BBQ Rangers also staying within striking distance, and the Wildfire going to the right to position itself in range of both door openings ready to react to the enemy's first movement out of the structure. The Pounder and Joe's Death Dealers went left to draw the Luther, Herman, and Heavy Laser Grenadiers to their side of the map. However, that also kept 13 Foxtrot from getting a safe view on a target, and the Corps Officers were specifically brought in to reload the Steel Rain and provide light healing while testing their abilities.

As the game progressed, Ozz took some heavy damage to protect his squad, and retreated to the Corps Officers to heal up after inflicting some light damage on Lara. 13 Foxtrot was eliminated before they could be of much use, but the Command Squad was able to get LOS on the Heinrich, and the Steel Rain made sure to fire it's entire payload to secure the kill. Plus the Corps Officers were close by to immediately reload! Johnny and his squad took a chance while Sigrid was hurt, but the lack of luck on the next activation gave Sigrid the advantage. By the end of close combat the only one left standing was Sigrid with a single hit remaining. The Wildfire was able to score the kill on Sigrid, but ended up falling to fire from the Heavy Flak Grenadiers, and the advantage of their Burst Weapons (double dice!!!), but not before dealing more damage to Lara. 

The game turned in the Allies favor at a very specific point. The Ludwig destroyed a tank trap that was in it's way, to have easy access to an exposed Pounder. When the Ludwig made it's move, it was only able to score one hit on the Pounder. The Hermann was quick to back up the Ludwig to go for the kill shot, should the Ludwig be destroyed in the Pounder's retaliation. The Pounder was able to quickly fire and destroy the Ludwig! Plus the Steel Rain was able to move into a support position behind the Pounder, but out of range of the Herman, should the Pounder fall in the next turn. However a great stroke of luck came to the Allies when they were able to successfully reactivate the Pounder! This might not sound like much, but this was the ONLY successful reactivation of the entire game, and it was exactly the reactivation the Allies needed. The Pounder made short work of the Hermann, but the Heavy Laser Grenadiers immediately came out and scored the revenge kill on the Pounder. At this point the Steel Rain had a direct shot lined up at both Lara and her Heavy Recon Grenadiers, now out of their building on the right side of the map and out of cover, as well as the 2 remaining Heavy Laser Grenadiers, who were out of range. The decision was made to have the Steel Rain go for Lara and her squad since they were a threat to the Boss Squad, so all 4 Rockets were fired and dealt more than enough damage! Damage Resilience came to the rescue and kept Lara and one of her squad members alive. The Steel Rain was also able to shoot it's .30 Cal MG at the Heavy Lasers and scored 1 hit. Joe and The Death Dealers were quick to clean up the last unit and start movement into the building.

At this point the game was pretty much in the Allies' pocket. Ozz and his squad were able to make short work of the Recon Grenadiers, and the Petard Mortar helped to nearly finish off the Heavy Flak Grenadiers. The Corps Officers were also able to give Ozz & The Grim Reapers a shot with their Stim Pack, and after a Double Move & Sustained Attack with Heroic Attack, they were able to finish off Lara and the Laser Grenadiers with a massive amount of hits. At this point the game was called since only the snipers and 1 Heavy Flak Grenadier remained. The Allies still had a full squad, and nearly fully healed, of Grim Reapers with Ozz, a Boss Squad AND Corps Officers with no hits, Joe & The Death Dealers with some light damage (though Joe was down to 1 hit), and the Steel Rain (with no more artillery shots). A great game, and our new players had a blast with all the carnage. Hopefully we have some new league members, but in the very least our attempt to generate more interest in the Portland area is becoming more and more successful. 

We made an attempt to play the 4 player scenario out of Cerberus, but didn't have enough time to get past turn 3 before people had to start heading home and the store was getting ready to close up for the night. Hopefully we can try it again in 2 weeks at our next official game night!

Good Gaming!!

Thursday, March 8, 2012

A Need For Calrification In March

I recently submitted these Questions to FFG for clarification. Your Thoughts? (I will post the response in the comments section)

Greetings! I have a few questions after my last league play night and using the Heavy Walkers and structures for the first time, as well as a few others that have been in the back of my mind.


Flame weapons vs. multi-level structure
When the Hot Dog or Fireball attack units in a structure how does the “fire arc” work? According to the established rules the flame weapon can inflict damage on all units in spaces between the attacking unit and the target unit. The Hot Dog has a range of 2, and if adjacent to a multilevel structure only needs a range of 2 to reach the roof. If the Hot Dog targets a unit on the roof does the flame weapon only affect the units on the roof and 3rd floor, since that would require a range of 2 and would be 2 adjacent spaces? Or would the flame weapon also hit all the other floors? Or can the Hot Dog only target the ground floor and floor above? The Fireball has a range of 3, and can be adjacent to 2 squares of the structure. So pretty much the same question, but with a range of 3, the possibility of “dancing” diagonally up the building since LOS and Range requirements would be met. Such as: The Fireball is adjacent to 2 openings on a 3 story structure (1st, 2nd, 3rd, Rooftop for a total of a height of 4). There is a unit on the right of the fireball on the 1st floor, left of the fireball on the 2nd floor, and then right on the 3rd floor and rooftop (4 targets in total). Can the Fireball target the units on the first 3 floors since it meets the range of 3, and does not break LOS? Same for the targets on the 2nd, 3rd, and 4th floor? Or can I only target 1 section of a multilevel structure and it affects all units or 3 stories of that section?
Sorry if that was confusing, but I saw so many possibilities with only needing a 2 range to reach the roof. I couldn't find a way to make an image to help explain what I was shooting for with the materials at my disposal.


Do units on the roof follow "structure" rules for LOS, since they are not considered to be in the structure? So basically, does the unit have to be on the side of the roof facing the attacker (like inside a structure and on an exit facing the enemy), or, since the unit is not technically in the structure, can they be targeted anywhere on the roof as long as there is 2D LOS?


Can units with the Jump ability jump off the roof of a structure? It’s clear they cannot land on the roof, but not so much about jumping off the roof.


Is placing its own action that can't be combined with any other skills or actions? The most I can find is in the Original Core Set rulebook saying that placing on the board is always a “one space move action.” Hopefully these follow up questions will allow this to make a bit more sense:
  • So units with move 2 can only have the 1 space on placement, correct?  
  • Can the Fireball use its scout ability to save its second action to perform an attack, or does the scout ability apply after both actions are finished? So basically it could it be possible to perform a Placement+ Scout for the 1st action, and attack for the 2nd action?
  • Can units with Fast use their fast ability when placing? Such as Placement+Fast for the first action, and attack for the second action?
  • Same with Charge. Can Markus and the Gorillas perform a Place/move/fast/charge?


Are the Rubble Tiles in the Original Core Set supposed to have a '+' icon? Are any of these tiles supposed to be released in an expansion? The terrain type was announced in Operation Cyclone over a year ago and I have yet to see any tiles with this marking and am anxious to give them a try.

Wednesday, March 7, 2012

More SSU units and Axis Medium-Heavy Walkers

Commissar Squads can act as it's own unit, or be broken up to embedded into to other infantry units (like Heroes) to add more versatility to your army!

Looks like FFG has announced more units for release in late second quarter 2012. Looking forward to these additions and hoping that the Allies won't be left in the Dust (no pun intended) as the SSU takes over as the "speedy faction" and the Axis gain more devastating long range and heavily armored units (because, you know, the Axis needed more units with unlimited range and heavy armor...)

Commissar Squads, more Helicopters, more KV-47's (with artillery options), and 3 new German Walkers. Check it out here.

Good Gaming!

Monday, March 5, 2012

Some Dust on March 4th

In the interest of looking for new players for the league we set up a day to play at another location in Portland. Guardian Games is a wonderful place to play, with lots of space and selections of games being played any given time, and the only downside being a complete and utter lack of parking. This was also my first opportunity to use Operation Cerberus, the Allied Hero Pack, Red Devils, Allied Heavy Walker, so I was very excited to use as many of these miniatures as I possibly could.

Only myself and Jiltedtoo were able to attend. The first game we played was the first scenario from Operation Cerberus. The Allies nearly had the victory, but the Axis were able to counter the strategy and eliminate the entire Allied unit before the end of the 5th turn.


Before we finished this game we had a Father and son express interest and we ran through the scenario again with them both. Allies picked up a narrow victory, thanks to that wonderful Jump skill :) After exchanging information we hope to add a few new players to the league.

The birthday boy, left, (yes it was his birthday) looking over his options

 The moment before Rhino and The Grim Reapers jump off the building with the objective, and off the map for the win

From this point our new friends had their own event to participate in, so Jiltedtoo and I continued with Cerberus. This time the second scenario, which looked like it could go either way until the Allies entered the building, and I realized that the Machine guns on the Fireball were still effective in eliminating units in, and on top of the building, since Jiltedtoo pretty much kept his units on the roof and top floor. Within about 6 turns the Allies were able to eliminate the entire Axis force by keeping the Fireball close to one side of the building while advancing infantry through the other side of the building. The Chef and Crackshots weren't too bad of a combination, but by the time they made it to the front line the battle was all but won. Really disappointed that the Chef has no real purpose for all those points other than some minor close range damage. Not even Assault? Really?


Allied Army: Fireball - Rosie & Crackshos - Chef & Crackshots - Rhino & Grim Reapers - Ozz 117 & Grim Reapers - Action Jackson & Red Devils - Johnny & Gunners - Priest & Hell Boys - Bazooka Joe
400 Points
Axis Army: Beobachter - Lara & Heavy Laser Grenadiers - Tank Killers - Angela & Sniper Grenadiers - Kommandotrupp - Manfred & Sturmpionere
200 Points

Both end of game photo's. Chef & Crackshots on the roof after scoring the game winning kill, and their only attack of the game. Rosie (with her Crackshots) and Action Jackson (with 1 Red Devil) on the top floor. Johnny (and his full squad of Gunner Rangers) on the second floor. Bazooka Joe on the bottom floor.
(We kept the Hero on the half-tile and the rest of the units off the board for ease of play with the structures)


Our last game was the 4th scenario from Cerberus, and while the Allied forces still had double the points of the Axis army, the range factor, and game-breaking combination of Angela with the Sniper Grenadiers made approaching the building nearly impossible. Angela accounted for 7 of the 9 hits required to eliminate Johnny and the Gunner Rangers (the other two came from the Sniper Grenadiers) all in one attack action. By turn 4 the Allied forces had the Punisher, Bazooka Joe with Crackshots, and Priest with the Hell Boys left to try and take out a nearly untouched Axis foe.

How the hell am I going to approach this building after loosing the Wildfire, Ozz/Grim Reapers & Rhino/Grim Reapers??

All in all a very fun time and great learning experience (I do have to say that Rosie is so much more valuable with the Heavy Tanks in the game. Both games she brought them back from the brink of destruction). I look forward to our League Night this coming Sunday and getting ready for Dust Day in Olympia!

I have to admit, without hesitation, that I love this game and hope to continue playing it for years to come, but unfortunately the balance is without a doubt in heavy favor of the Axis. With "fast" moving zombies (as ridiculous as sparkling vampires, and the only Armor 3 unit with 5 miniatures), Unlimited Range on nearly every walker, Totenmeister, and now Angela with her deadly abilities and combo potential, I have little hope as an Allied player to pull a victory without relying mainly on how the die rolls, because strategy becomes irrelevant when the die rolls the wrong way. Now with the SSU having "speedy" units I am starting to feel the one main edge the Allies had, quick movement, will become irrelevant in time as more and more units are released with these abilities for all the factions (I mean really... Half the Axis Heroes have Assault vs. 1 Allied Hero (**cough cough** Chef too?? **cough cough** would make his 22 points worth something **cough cough**), And the SSU "Hero Walker", "Grand'ma", already has Assault). Now my small gripe is over.

Good Gaming!!

Operation Ghostlight

Our friends from Radio Dust, and the first ever DUST DAY in Argentina, created a custom campaign which many of you may have heard about. Operation Ghostlight is now available for download on the Documents page. An undercover investigation from the Axis into the possible existence of a secret alien facility in the Neutral country of Argentina has stirred both the SSU and Allied forces in control of that region of the globe. Who will be the first to locate the Ghostlight and discover the alien facility?

Thanks again to Aldarion, Pablo, and Loophole Master for a fantastic campaign and the addition of new terrain tiles, which I hope to incorporate into my games and custom campaign.

Good Gaming!