Wednesday, August 22, 2012

PDX DUST Leage Returns!!

PDX Dust League Returns!

Our first official game was the DUST Warfare game we played on July 29th, 2012 that will be featured in the upcoming full Warfare Battle Report! The League report will group the games together based on whether or not it was Dust Warfare or Dust Tactics, with each section describing the games in more detail. Check out the updated League section to learn more about the new PDX DUST League.

While in the comfort of a house that was at least 100 degrees at it lowest point, we dove into Operation Cyclone and played the first mission Standing On The Beach. The game lasted a little under an hour so we decided to open the Dust Warfare Zverograd Campaign Book and played 2 three-way battles. We also had a visit from Olympia's Dust Group and played a 4 player Warfare game!


Nicholas and I decided to start playing through the Dust Tactics Campaign Books. Operation Cyclone was the obvious choice as it follows Operation Blue Thunder, and is the only other campaign book with the original point system (4 points for vehicles and 2 points for infantry). 

Additionally Nicholas and I played 2 games of the Ambush Scenario, which will be featured in an upcoming blog article. John Sisk and one of our newer league members, Jeffrey Durkauff, played 2 games of generic Dust Tactics scenario's. Jeffery built an Axis force and John built an Allied force, then after the first game swapped forces and played through it again. John came out victorious in both games.

Unfortunately we don't have many pictures or details outside of the Operation Cyclone games.

Mission 1: Standing On The Beach
Date of Play: 08-05-2012
Justin v. Nicholas


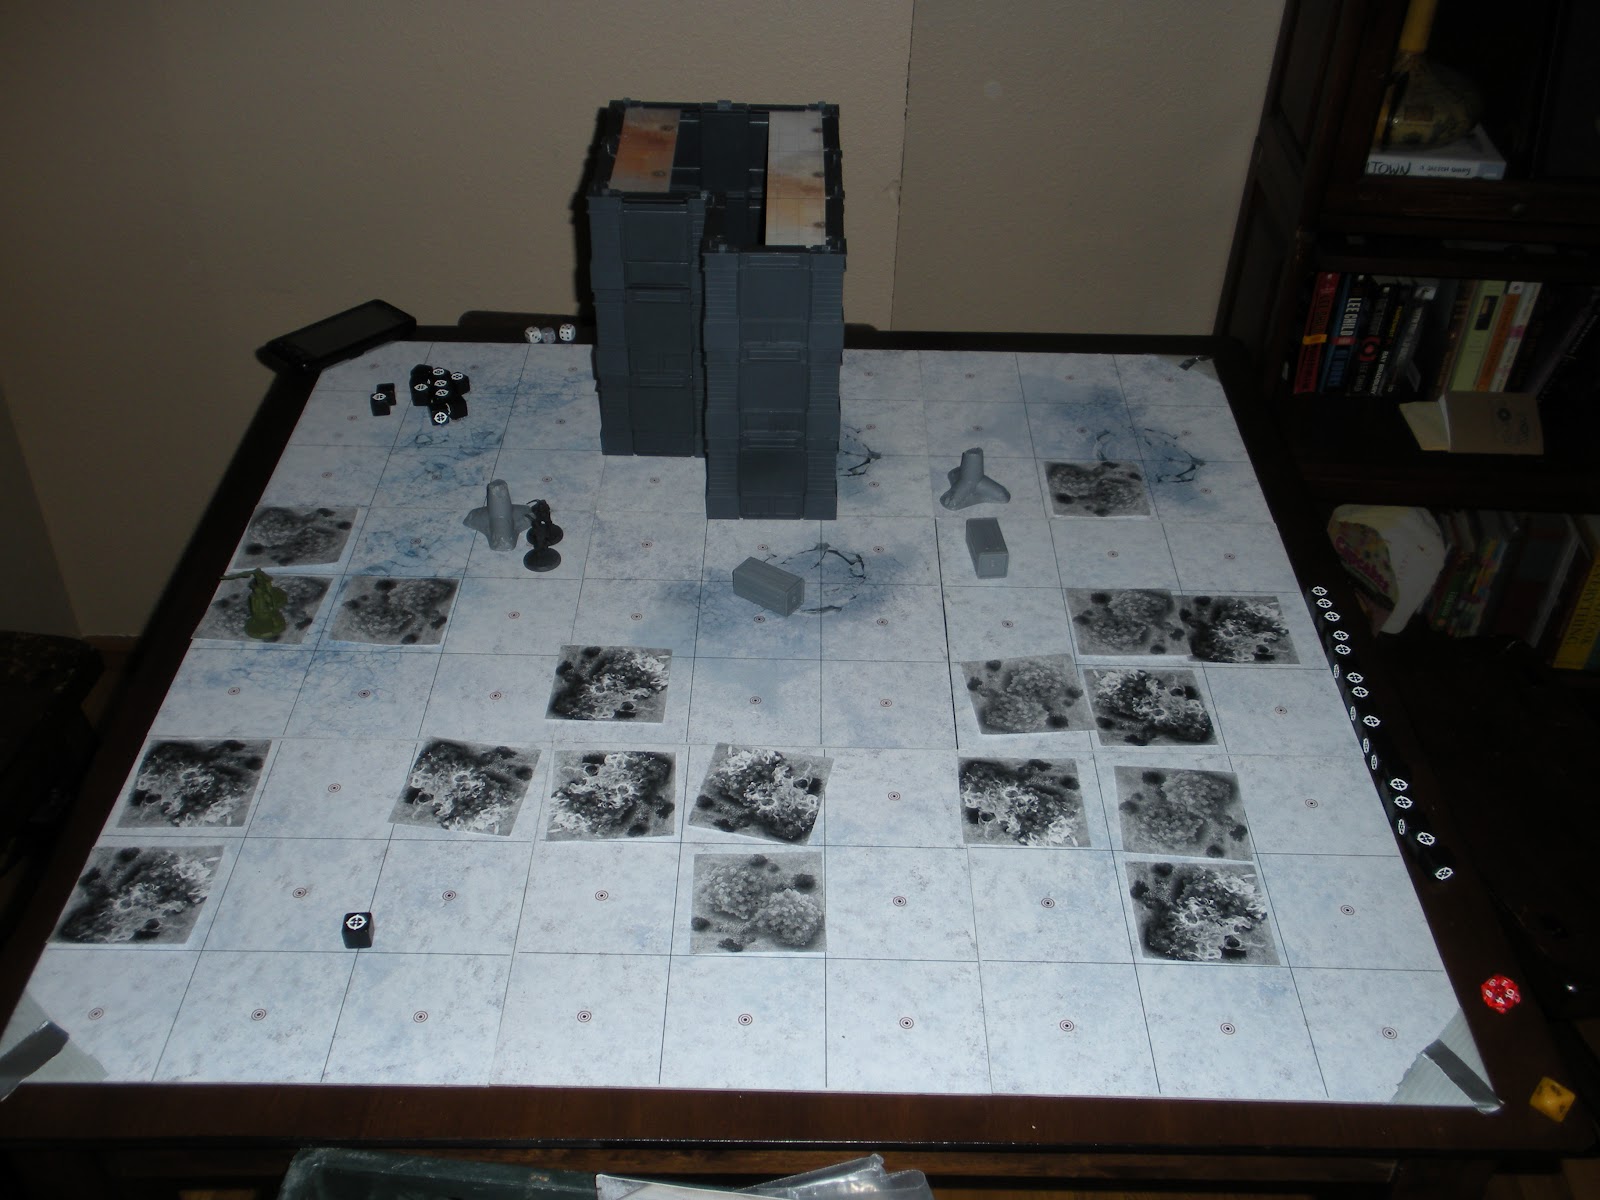
The objective for this scenario is for the Attacker to get 1 unit into the enemy deployment zone, and have it survive until the end of the round. The Defender must prevent this at all costs. The game is limited to 8 turns, however the game may finish before the limit is reached if either side achieves their objective. The Attacker gets 300 points to begin with, where the Defender cumulatively stacks 40 points each turn to purchase units and defend their territory. 4 Tank Traps and 4 Ammo Crates are available for cover and must be placed in the marked squares.
  • Attacker:
    Justin - Allies: 298 points
    OZZ-177 - The Priest - 13 Foxtrot - BBQ Squad - Corps Officers - Grim Reapers - Recon Boys - The Hammers - Cobra - Rattler - Steel Rain
  • Defender:
    Nicholas - Axis: 159 points
    Turn 1: Ludwig
    Turn 2: NONE
    Turn 3: Lara - Heavy Recon Grenadiers - Recon Grenadiers - Recon Grenadiers
    Turn 4: Recon Grenadiers - Axis Gorillas
This game was over in half the Turn limit. This scenario would have been much more difficult for the Attacker to when the only units released for Operation Cyclone were the Original Core set, each respective factions Medium Walker expansion with Artillery Units, Specialist Units, Command Squads, and Bot/Tank Hunters. This was pretty much a lock with Heroes like OZZ-177 and move 2 infantry. Granted Panzer Walkers could be used to block the movement of the jump troops, but that also keeps them very exposed, and less able to utilize the support of other units.

The Axis units made sure to place at least 2 Tank Traps directly in front of 2 landing crafts, making it difficult to deploy the Allied Walkers. The Cobra made short work of a single Tank Trap in Turn 1 to eliminate the need for the Walkers to Jump over the obstacles, where Turn 2 brought more advancement by the Allied force while taking fire from the Axis Ludwig. Turn 3 saw the Destruction of the Ludwig by the Steel Rain, while OZZ and his Grim Reapers were getting in position to take the objective in Turn 4. The Allied force was able to eliminate a unit of Recon Grenadiers in Turn 4, and helped to secure a good path for OZZ and his Grim Reapers to make a Heroic Attack and land safely in the Defender's Deployment Zone. The rest of the turn was played out, even though the Axis had no chance to eliminate the Allied unit before the end of the Turn. The Hammers, 13 Foxtrot, and The Priest with his BBQ Squad did not survive the round after Lara with her Heavy Recon Grenadiers along with the Axis Gorillas took what revenge the Axis could.
  • Victor: Justin - Allies


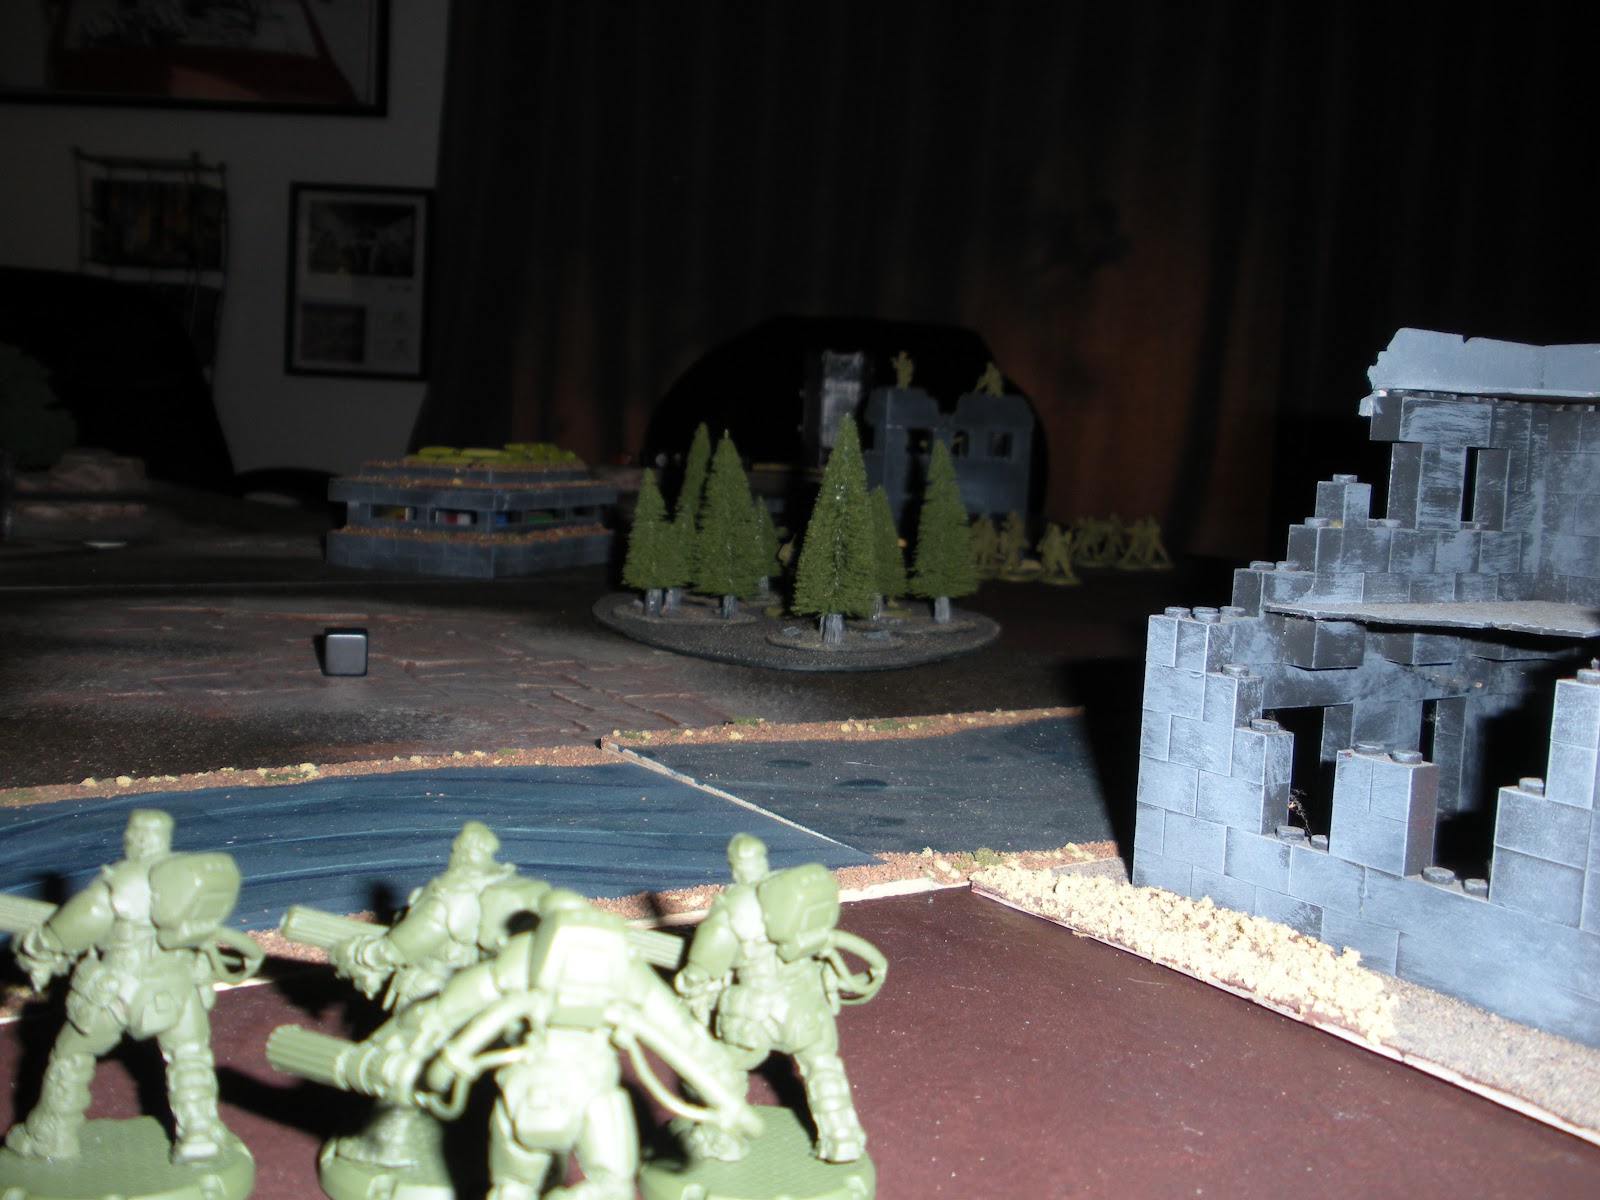
With the recent release of the Zverograd Campaign Book we decided this would be a perfect opportunity to try a 3 player game. We decided to play the Standoff Scenario provided by the Dust Warfare Zverograd Campaign Book. After the end of the First Turn of the game we realized that we forgot to implement the Scenario Conditions, which are Limited Visibility and Off Target Shelling, so we ended up playing 2 games using the same Army List.

The objective of the scenario is for the Attacker to eliminate the Defender's VIP, the Defender to eliminate the Opportunist's VIP, and the Opportunist to eliminate the Attacker's VIP.  Each player selects one of his Command Sections to be their VIP after all players have deployed their forces. If a player eliminates a different VIP than assigned, then the player assigned to eliminate that VIP is declared the winner. The scenario is played for 5 rounds, and if no VIP is eliminated by the end of the 5th round the game end is a draw. Each player will receive 25 points to spend on Fortifications.


Player:JustinNicholasJohn
Faction:SSUAXISALLIES
1st Platoon
Command Section:SSU Command SquadKommandotruppOZZ-177
1st SectionSSU Rifle SqaudBattle GrenadiersHeavy Ranger Attack Squad
2nd SectionSSU Close Combat SquadLaser GrenadiersHeavy Ranger Tank Hunter Squad
3rd SectionSSU Auxiliary Attack SquadHeavy Recon Grenadiers---
4th Section---------
HeroKoshkaAngela---
Support Units-Grand'ma
-Natasha
-SSU Observer Team
-Karamazin
-Derzhavin
-Sniper Grenadier Team
-Flamm-Luther
-Hans
-Sniper Team
Platoon UpgradeImproved Command------
2nd Platoon
Command Section:------Action Jackson
1st Section------British Paratroops
2nd Section------British Paratroops
3rd Section---------
4th Section---------
Hero---------
Support Units---------
Platoon Upgrade---------


Game 1:

  • Attacker: John
  • Defender: Justin
  • Opportunist: Nicholas
Nicholas and Justin each named their only Command Section their VIP unit, where John named Action Jackson from his 2nd platoon as his VIP unit. Since Action Jackson and both British Paratroop units were off the table with their Air Drop ability, John would be forced to deploy the unit in the Unit Phase of his First Turn. Both John and Justin purchased Mines, where Nicholas decided to purchase mines and camouflage for 2 of his units, Angela with her Sniper Grenadier Team and the Kommandotrupp.


The Turn 1 initiative ended with Nicholas being the Primary player, Justin being the Secondary player, and John being the Tertiary player. With the forgetfulness of the Limited Visibility the SSU player lost Grand'ma, the Karamazin, and Koshka with her SSU Close Combat Squad by the end of the first turn. However, the SSU were able to destroy the Flamm-Luther in retaliation. John placed his Air Drop units in the SSU deployment zone, ensuring that both players were far from the VIP unit.


Initiative for Turn 2 ended with John as the Primary player, Nicholas as the Secondary player, and Justin as the Tertiary player. John finished off the SSU Observer Team in the Command Phase, where Nicholas utilized his Kommandotrupp to fire the Hans' Granate Werfer, and thus revealed the VIP unit so that all players could establish Line of Sight from within the structure they were using for cover. Since Justin was the Tertiary player, his Unit phase immediately follows his Command Phase. With the Kommandotrupp revealed the SSU were able to capitalize on the situation and targeted the Opportunist's VIP unit with an All In One Sustained Attack from the Natasha. The 45mm Howitzer's ability to ignore cover, along with rolling double the attack dice with a re-roll, was all it took to eliminate the Kommandotrupp and secure victory for the SSU!


Game 2:

  • Attacker: John
  • Defender: Nicholas
  • Opportunist: Justin

This time we made sure to utilize the Limited Visibility and Off Target Shelling conditions. The VIP for each player remained the same. John did not utilize the Air Drop for his troops since Nicholas decided to line up his force along the edge of his deployment zone facing Justin, his target for the second run through of the Standoff Scenario. Justin had his Walkers lined up to penetrate the minefield that John had placed along his deployment zone, with nearly every infantry squad ready to follow the Walkers into battle with the Allied troops, while keeping their flanks protected from Axis the oncoming Axis onslaught.


Initiative for Turn 1 ended with Justin as the Primary player, Nicholas as the Secondary player, and John as the Tertiary player. This turn also involved a lot of moving, but not a lot of shooting since most infantry units could not be seen, and most vehicles were out of range. Angela and her Snipers came out of their cover and started moving towards the action.


Turn 2 initiative saw John take the role of the Primary player, Justin as the Secondary player, and Nicholas as the Tertiary player. John was able to eliminate the Nick's Laser Grenadiers who were holding the opposite structure. John then made an attempt to move his Red Devils into range of the SSU's Natasha, but fell to Reactive Fire from the SSU Walker.


Turn 3 brought Nicholas to the position of Primary player, John as the Secondary player, and Justin as the Tertiary player. John was able to position his Tank Busters outside of Reaction range of the SSU's Natasha and scored enough hits to penetrate the armor for the kill! Justin's SSU Rifle Squad and Grand'ma took shots at the Hans, which were enough to eliminate the Light Panzer Walker, while simultaneously focusing fire on the Battle Grenadiers on the bunker near the Hans for another kill! John used his Allies to focus attacks on Angela and her Snipers to eliminate the Axis unit. The Flamm-Luther kept the SSU on the move and on the opposite side of the structure to keep the Line Of Sight blocked.


Turn 4 saw John take the roll of Primary player, Nick to Secondary player, and Justin to Tertiary player. Nick's Flamm-Luther combined its shots to eliminate the SSU Auxiliary Attack Squad inside the blocking structure, then move into position to eliminate Koshka and her Close Combat Squad with the Karamzin. The SSU took another loss when John's Allied Tank Busters moved in on the Grand'ma and successfully destroyed the rare KV-47. Justin thought this would be the perfect time to make use of Koshka's Fighting Spirit skill. The combination of the Karamzin's PTRS-47, The Sulfur Thrower, and Molotov Cocktails with the addition of reversing the combat die rolls proved too fatal for the Axis Walker and the Flamm-Luther was destroyed! John then made an attempt to cover some distance with his Ozz and his Grim Reapers to attempt a chance to eliminate Nick's Command Section and gain the victory.


Turn 5 brought the final initiative with Justin as the Primary player, John as the Secondary player, and Nick as the Tertiary player. John realized his Ozz and his Grim Reapers couldn't cover enough distance to follow up with an attack against Nick's Axis Command Section, so he decided there needed to be a victor of the scenario and focused his attack on the SSU Command Section even though the victory would go to Nick should he succeed. However the Grim Reapers did not score enough hits for a kill and the SSU survived! The SSU achieved revenge by eliminating the Allied Hero and Heavy Ranger Attack Squad. At the end of the round every Command Section was still alive, so the game ended in a draw.

At the end nobody took the Victory. Justin was able to eliminate 5 full units, John was able to eliminate 4 full units, and Nick was successful in eliminating 1 full unit.

4 Player Team Game:

We had a special visit during our August 12th League Games. Jason McFarland, our gracious host for Dust Day Olympia and Dust Tactics Regionals joined us for a 4 player game of Warfare! Jason and Justin took the Allies, and Nicholas and John took the Axis. Each player had 200 points to build their platoon.

Player:JustinJasonNicholasJohn
Faction:ALLIESALLIESAXISAXIS
Command Section:Ranger Command SquadHeavy Ranger Command SquadHeavy KommandotruppKommandotrupp
1st SectionRanger Weapon SquadHeavy Ranger Tank Hunter SquadAxis GorillasBattle Grenadiers + Panzerschreck
2nd SectionHeavy Ranger Assault SquadHeavy Ranger Attack SquadHeavy Recon GrenadiersBattle Grenadiers
3rd SectionCombat Ranger Squad + BazookaCombat Ranger Squad + BazookaBattle GrenadiersHeavy Recon Grenadiers
4th SectionAssault Ranger SquadRanger Weapon Squad---Recon Grenadiers
HeroPriestJohnny One-Eye---Stefan
Support Units-Rattler
-Wildfire
-Sniper Team
-Pounder-Wotan
-Flamm-Luther
-Lothar
-Heinrich
-Observer Team
Platoon UpgradeImproved Command------Improved Command

It was decided the each side would roll a collective Command Pool and use the orders accordingly. For the map itself we used the standard Warfare scenario generator.
  • Objective: Eliminate the Enemy
  • Deployment: Force Collision
  • Condition: Off Target Shelling


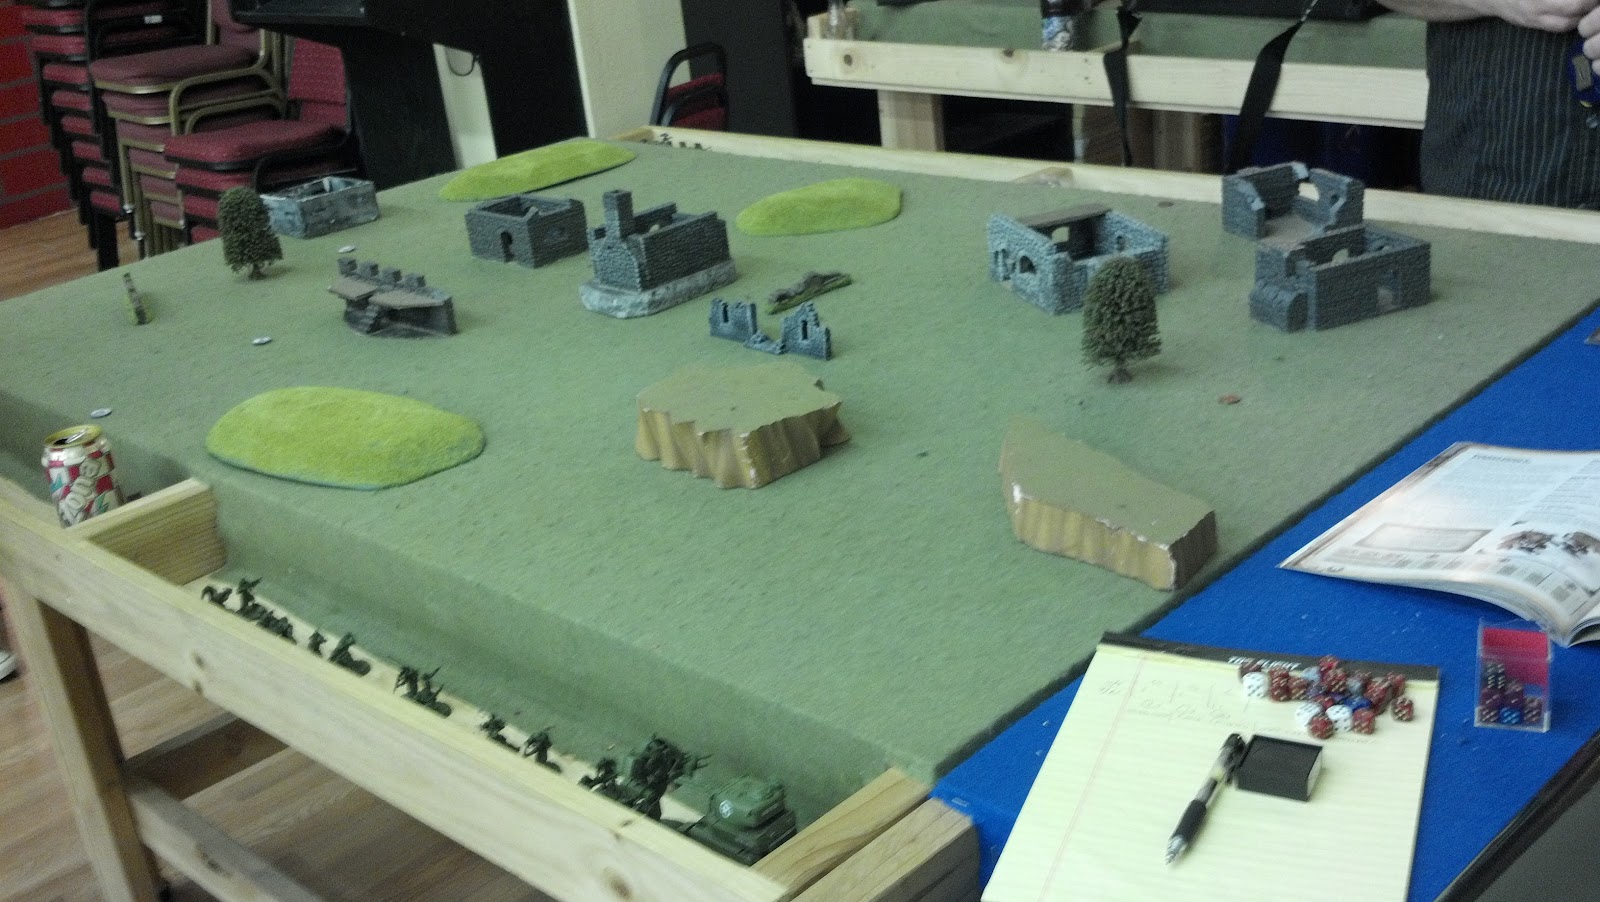
The First Turn just saw each side advance their forces a little further down the battle field.

Turn Two brought the first bit of action with the Wotan successfully eliminating the Wildfire. The Tank Busters tried to get into a good position, but were eliminated by fire from the Flamm-Luther and a solo unit of Heavy Recon Grenadiers. The Allies did get some revenge when the Hammers jumped next to Stefan and laid waste to the Hero and his unit of Recon Grenadiers.

Turn Three saw a lot of suppression fall on the Hammers during the Command Phase to ensure the unit would no longer be threat, however the unit was eliminated by the Battle Grenadiers before the Unit Phase. The Command Phase also saw the Wotan successfully score enough hits on the Pounder to score another kill. The Allies did get some revenge in the Unit Phase when the Rattler finished off a unit of Heavy Recon Grenadiers. However, it was short lived when the Death Dealers fell to the Axis Gorillas, though they were able to eliminate one Gorilla with Reactive Fire.

Turn 4 brought the game to an end. Jason had to get going and the game was pushing 2 hours at this point. During the final Command Phase the BBQ Squad fell to fire from the Kommandotrupp, 2 Battle Grenadier Squads, the Wotan, Flamm-Luther, and finally the Axis Observer Team. The Unit Phase then saw the Priest fall, but before the end of the Phase the Allied troops were able to eliminate the Axis Gorillas.

Superiority Points:
  • Axis: 6 points
  • Allies: 3 points
The Axis gain the victory!

That's all for now! The next League Game Day will take place this Sunday. More Warfare and Tactics games. Also, I spent the previous weekend in Vancouver, B.C. and played some games with my friend Christian. There will be a report of the 5 games we played and who came out on top! Good Gaming!!

Tuesday, August 7, 2012

Grand'ma Redux!


Enjoy the following from John Sisk and his Custom painted Grand'ma. The picture above is for comparison for those who haven't seen an "official" version of the model. The unit card is available to view in the Unit Cards section. Finally, be sure to check out the new Awards section!! Good Gaming!!


The SSUs KV-47 is one of the coolest looking Dust models, in my opinion. So I was very excited when I finally got my grubby little mits on my very own Grand'ma!

The first thing I noticed is that, as cool as the model may be, its positioning looks a bit awkward. A little like it’s about to face plant! Some other skilled modelers I have seen have removed the legs and repositioned them to a more upright, static stance, and while those look very good, I saw an opportunity to do some "mad scientist" modeling to remedy Grand'ma’s drunken lurching!

So, thinking that this would be a wonderful excuse to destroy a $30 model, I selected a Luther hull and arms for an action oriented base. Grand'ma's leg position turned out to be perfect for a running leap pose over wreckage!

So 1 saws-all later (accompanied by much evil cackling!), I had two-thirds of a Luther, and a destroyed cannon arm! I drilled a 1/8 inch hole in the Luther and the pad of Grand’ma’s left foot and pinned it with a large plastic rod, and about a cup of thick gap-filler super glue, then used white craft glue, aka, Elmer’s, and pilled the base with sand, and small cinder blocks cut from square plastic rod. For paint, I wanted the wreck to look old, like it had been in the rubble for some time. Maybe a Luther destroyed months before in one of the Axis other assaults on whatever city they are trying to burn! So I used black primer, then a heavy dry-brush of GW Codex grey, and then progressively lighter layers of grey up to a dusting of GW fortress grey. Then a rough brushing of P3s Pig Iron on the Luther’s edges and surface plates. A thick, messy wash using a custom wash I make from Model Masters Acrylic 4606 Raw Umber. The umber dry’s leaving a dulled, busty look, with no glossy effect, great for, realistic, dirty weathering.

Grand'ma was a lot more difficult, simply because I couldn’t decide what colors to use! Eventually, I figured since it was a special character’s robot, something a little flashy was called for! The primary color, the green, I decided, would be a bit darker than typical Russian camo, so I used P3s Ordic Olive. This paint did NOT go on easy! It blotched, and separated, and beaded like crazy! So I ended up doing 4 thin coats and still had a subtle uneven look, witch, after the Umber wash looked great! For the reed upper parts ( 1 chose the upper most armor plates from each part of the model, shoulders, hips, and upper torso ) I used P3s Skorne Red, then brushed a very light dry brush of GW Blood Red. Then the Umber wash, a bit of chipping ( using blotched of Codex grey followed by smaller areas of Pig Iron ) then a light dry brush of Fortress grey over the legs and feet, to represent masonry dust, and its 90% finished!

I haven’t done the decals yet, and some of you may have noticed the butt-plate is missing? I removed it hand paint the words "follow me!" In Russian! And a couple other small details (spotlight, bullet holes in the chest, antenna) need to be finished. 

But, overall, I am quite pleased with my action pose Grand'ma! But now I have to paint and model the rest of my SSU to match....maybe I can get someone else to do it...... :)

~John Sisk

Monday, August 6, 2012

World Dust League Returns!!


The World Dust League website makes a triumphant return! Start playing games and be ready to submit them starting August 13th when the League officially starts. It's been too long since the World League was lost and we are happy to see it alive and well!

Secondly, the winners of the First World League have been announced!!
Nicholas J. Gyore is the winner!!
Justin Tyrrell came in second place.
Patrick Doty came in third place.

After conversing with Floris form the World League project I discovered that John Sisk took the 4th place position! We are very proud that our small and stubborn group dominated the World League and we look forward to the competition the second round is sure to bring! Congratulations to Nicholas for dominating the Leaderboard for nearly the entire duration of the League!!

In other news, We are still prepping the Warfare Battle Report (it's a BEAST) and just finished our second game night in our league! The site will be updated by the end of the week with the new League information, and Awards section, and finally an Information/About PDX section!

Long live the DUST-LEAGUE and Good Gaming!!

Saturday, August 4, 2012

Destruction! Play-test 1


Destruction
Play-test 1
Date Played: 07-15-2012

The Allies have located a hidden Axis outpost near the town of Wick in the Highlands of Scotland, near the raging battlefield of Scapa Flow. The Axis platoon is hiding out in an abandoned structure near the River Wick and is thought to be awaiting further reinforcements. ASOCOM has determined that the Axis units and the structure must be eliminated and has dispatched a force to set demolitions in the building and destroy it at all costs. The Axis troops are suspected to have units hidden in the surrounding forest to protect the outpost from any approaching force, and their reinforcements should be arriving at any time.

What is the point of this scenario? The point is for the Attacking player to enter and destroy the structure. The details will be found in the scenario guidelines below. The idea behind this scenario was to create a possible "suicide mission" since it will be possible to sacrifice the unit and detonate the explosives immediately, at the cost of an additional action and a penalty to victory points.

We played 2 games during this Play-test since the first game was over in less than 45 minutes. These were very challenging games for the Attacker, but provided great insight to how the scenario can be improved during future Play-tests. Delayed deployment and changing deployment zones for the Defender are a few of the adjustments that will be made the next time around.

Special Terrain:
  • Forest Tiles:
    Refer to OperationGhostlight for rules on Forest Tiles, but here are the basics:
    • Blocks Line Of Sight, except for a unit occupying the space.
    • Blocks Vehicle Movement
    • No Cover Elements may be placed on this square
    • Provides Soft Cover for Infantry Units.
    • No Cover upgrade to Corner Cover from Forest Tiles for units already occupying a forest tile.
    • Can be set on fire to become a Forest Fire Tile by Heavy Laser Weapons, Phaser Weapons, and Flame Weapons. See Operation Ghostlight for more details.
      • Forest Fire Tiles block all movement (including jump), block all line of sight, and cannot be occupied by any unit.
Scenario Guidelines:
  • No turn limit, unless desired by the players. Good rule of thumb is 10 turns.
  • Army Points:
    • Infantry and Heroes Only!
    • 200 to 250 points for both the Attacker and Defender
  • Cover Elements
    • Defender places on any valid space within the highlighted section of the map.
    • 2 Tank Trap
    • 2 Ammo Crates
  • No initiative roll on the first turn only. See Attacker section for more details.
  • The objective is to destroy the Structure that the Axis are using as a foothold in the Highlands of Scotland. The Structure is 3 stories tall and should resemble something close to the "standard" look of the Cerberus and Zverorgrad buildings.
  • The Defender will have a force deployed in secret. Refer to the Defender section for rules regarding those units. All other units will enter the board normally during the first turn.
  • Each Attacking Infantry and Hero unit is considered to have all the necessary resources to complete the mission. These resources are limited however, and once a unit no longer has these resources once the explosives are placed. These resources may be "reloaded" using the Ammo Dump Skill provided by the NCO Command Units following their normal rules.
    • To place a charge the Attacking player must spend one action. Roll a single combat die and on the result of a "miss" the charges are successfully placed. This charge is considered to be "time-delayed" and will detonate at the end of the next round.
      • If placed in round 5, they will detonate at the end of round 6.
    • An Attacker may spend 2 Actions to place the charges and have them detonate immediately. Roll 2 combat dice, and if there is at least 1 "hit" result the charges are successfully placed and detonation occurs immediately. A unit lost in this manner will provide the enemy double their amount in victory points.
    • A Defending Infantry or Hero unit may attempt to disarm a time delayed charge. To do this the defending unit must move into the square containing the explosives and spend an action to attempt to the disarm. Roll a single combat die and on the result of a "hit" the explosives are successfully disarmed. A unit that spends more than one action to attempt a disarming of the explosives will roll a combat die for each action spent this way and will succeed if at least 1 of the die produces a "hit" result.
    • If the explosives detonate the structure is destroyed and the game is almost finished. 
      • No other actions are taken by any other unit on the board.
      • Any unit occupying the square where the explosives were placed is automatically eliminated.
      • Other units in the structure most resolve a combat die roll against each individual miniature. On the result of a "hit" that miniature will suffer 1 damage. Any units that survive are then placed on any unoccupied valid square adjacent to the structure. If no unoccupied valid adjacent squares are available then the unit is eliminated. 
  • Attacker Rules and Objectives:
    • Destroy the Structure at all costs! The Axis cannot be allowed to gain another foothold in Great Britain. 
    • Always takes the first activation of the first turn.
  • Defender Rules and Objectives:
    • Protect the Structure and eliminate the enemy! Reinforcements are due to arrive at any moment.
    • Secretly deploy no more than half your forces in the forests and cover elements. Only the Forest Tiles and Cover Elements within the highlighted cover area may be used to hide units.
      • Units deployed in Forests Tiles and Tank Traps are not revealed until:
        • They are activated and perform a Move, Attack, or Skill action
        • Attempt Reactive Fire (regardless of success)
        • The enemy moves into an adjacent square
      • If an Attacking unit is moving and enters the same square as a hidden unit during their turn the 2 units immediately engage in close combat and resolve a single attack action using only close combat weapons. If both units survive the Defending unit stays in the square and the Attacking unit moves into it's previously occupied square. If the Defending unit is eliminated the Attacking unit's activation ends and occupy that square.
    • The rest of your units are the "Reinforcements" that you have been waiting for.  
    • A limit of 1 unit may be deployed anywhere inside of the structure during deployment.
  • Points and Victory:
    • The Defender wins if they are able to prevent the destruction of the Structure. This can happen in many ways:
      • The Structure is still standing at the end of the turn limit
      • The Attacker exhausts all his available explosives
      • The Attacker is eliminated
    • The Attacker wins if they are able to destroy the Structure.
    • Victory points from full unit kills may be tallied for other purposes, but are not used for any purposes for this scenario at this time.

GAME 1

Justin v. Christian
  • Attacker:
    Justin - Allies: 200 points
    Bazooka Joe - Johnny One-Eye - OZZ-177 - The Chef - BBQ Squad - Crack Shots - Grim Reapers - Hell Boys - The Gunners
  • Defender:
    Christian - Axis: 201 points
    Grenadier X - Lara - Markus - Axis Gorillas - Axis Zombies - Heavy Flak Grenadiers - Kommandotrupp - Recon Grenadiers


  • Pregame:
    Cover was placed by the Defender. The Tank Traps were side by side, and positioned between the Structure and Forest to the left of the map, effectively cutting off all line of site to that side of the Structure. The Ammo Crates were placed on the other side of the map in a diagonal formation. The combinations of Markus and the Axis Gorillas, and Lara and the Heavy Flak Grenadiers were placed in the forest for the hidden deployment.

    1 - MARKUS AND AXIS GORILLAS
    2- LARA AND HEAVY FLAK GRENADIERS
  • Turn 1:
    The Allies charged ahead and moved OZZ and his Grim Reapers 4 spaces... Right into Markus and his Axis Gorillas! They 2 units were occupying the same space, which reveals the Blutkreuz Apes and immediately engages both units in Close Combat. The Allies did a little damage to the Apes, but were severely hurt in return. The Zombies came onto the board to assist Markus and his Gorillas and finished off OZZ and his Grim Reapers while taking little damage in return. A hard loss for the Allies early in the game. Their response was to bring in their Hell Boys and BBQ Rangers to set the forest ablaze to force both Blutkreuz units to retreat.. The Kommandotrupp was the unit the Axis choose to deploy into the building, where it stayed for the remainder of the game issuing their orders from within the objective.


  • Turn 2:
    The Crack Shots moved up into the forest, while the rest of the Allied units moved away from the slowly burning forest. A double pronged attack from the Axis cost more Allied lives when Lara and her Heavy Flak Grenadiers revealed themselves while Markus and the Axis Gorillas attacked at the edge of the burning forest to eliminate the Crack Shots, nearly every Gunner Ranger and 3 hits on Johnny, and 2 hits on Chef with 2 more on the Hell Boys. The Axis Zombies in excellent position to support both Axis units in the next turn.


  • Turn 3:
    This round was the bloodiest of them all. The Allies took the initiative and Chef and his Hell Boys did enough damage to eliminate Lara and the Heavy Flak Grenadiers and plenty of hits on Markus and his Axis Gorillas. The Blutkreuz Apes fought back hard against Chef with the Hell Boys and Johnny with the Gunner Rangers. In the end the Blutkreuz Apes fell and were able to finish off Johnny with his Gunners. Grenadier X with the Axis Zombies then moved in for the kill to finish off Chef and the Hell Boys. However, Bazooka Joe was able to get revenge and eliminate the Blutkreuz Zombies with the help of his BBQ Rangers! The ever sneaky Kommandotrupp was successfully able to bring the Axis Zombie back into play with the Come On Guys; We're Going Back Out There skill before the end of the Turn.


  • Turn 4:
    The Axis Zombies charged into Joe with the BBQ Rangers, but Reactive Fire proved too effective and the Axis Zombies were once again eliminated before they had a chance to do further damage to the only remaining Allied unit.


  • Turn 5:
    The Axis Recon Grenadiers moved into a Tank Trap with line of sight on Joe and the BBQ Rangers in the forest and opened fire and severely hurt the unit leaving only Joe and the Flamethrower remaining. The Allied unit moved ahead and returned fire, but were only able to eliminate 4 of the 5 miniatures leaving the MG 48 to oppose the Allied unit.


  • Turn 6:
    The Axis won the initiative and opened fire on the Allied unit to eliminate Joe and the BBQ Rangers to win the scenario!
The Allies took a beating that entire game. Turn 3 was just a bloodbath and left the Allied army crippled, but not necessarily incapable of winning the scenario. The Allies would have had a decent chance to win had they taken the initiative in Turn 6 and eliminated the single Recon Grenadier. This game took almost no time to play and we were convinced we just needed a bigger force to obtain a better result. So we upped the points to 250 and started another round!


GAME 2

Justin v. Christian
  • Attacker:
    Justin - Allies: 250 points
    Action Jackson - Bazooka Joe - Johnny One-Eye - OZZ-177 - Crack Shots - Grim Reapers - Hell Boys - Recon Boys - Recon Boys - Red Devils - The Gunners - The Gunners
  • Defender:
    Christian - Axis: 250 points
    Angela - Grenadier X - Markus - Axis Gorillas - Axis Zombies - Beobacther - Kommandotrupp - Laser Grenadiers - Recon Grenadiers - Recon Grenadiers - Sniper Grenadiers - Sniper Grenadiers
  • Pregame:
    A Tank Trap and Ammo Crate were placed adjacent to each other and the solo Forest Tile on the right side of the map. The other Ammo Crate was placed next to the longest part of the structure. The other Tank Trap remained in it's previous position next to the forest on the left hand side of the table. The Axis chose to hide Angela with a unit of Sniper Grenadiers in the solo Forest Tile next to the Tank Trap and Ammo Crate, Recon Grenadiers on the right hand side in the top most Forest Tile of the group, another unit of Recon Grenadiers in the top most Forest Tile oft he middle group, and Markus with the Axis Gorillas on the left hand side of the map in the Forest Tile next to the Tank Trap that remained in it's location.

    1 - ANGELA AND SNIPER GRENADIERS
    2 - RECON GRENADIERS
    3 - RECON GRENADIERS
    4 - MARKUS AND AXIS GORILLAS
  • Turn 1:
    The Crack Shots were taken out early in the deployment phase by Grenadier X with his Axis Zombies who deployed from the side of the table and engaged them in Close Combat. Joe and his BBQ Rangers were quick to retaliate, but that left them open to fire from the Laser Grenadiers when they deployed onto the board from the same side of the map. OZZ was attempting to set the forests on fire, as was Action Jackson with his Red Devils. The Recon Grenadier in the middle decided to engage OZZ with his Grim Reapers inflicting damage on OZZ in the process.


  • Turn 2:
    The Axis won the initiative and eliminated OZZ and his Grim Reapers with the Recon Grenadiers. Johnny was able to exact swift revenge with the help of his Gunner Rangers. Joe and his Rangers retreated, which allowed the Recon Boys and the Gunner Rangers a chance to finish off the Blutkreuz Zombies and inflict 3 hits on the Laser Grenadiers. Action Jackson utilized his Assault ability to close distance to the objective and charged up the battle field with this Red Devils, only to take fire from the other hidden unit of Recon Grenadiers, and then had Markus and his Axis Zombies move in to finish them off.


  • Turn 3:
    The Allies lost their solo unit of Gunner Rangers to the unit of Axis Zombies that the Kommandotrupp, still hiding in the building, were able to bring back with the Come On Guys; We're Going Back Out There skil. The unit of Recon Boys that was backing up Action Jackson fell to the combined firepower of Beobachters, Recon Grenadiers, and Markus with this Axis Gorillas. The remaining Recon Boys moved into position to fire on and eliminate the Sniper Grenadiers, who were hiding in the tank trap on the left of the board, as well as eliminate another Laser Grenadier hiding in the forest. Johnny and Joe, both with the Gunner Rangers and BBQ Rangers respectively, were only able to cause 2 wounds on the revived Axis Zombies.


  • Turn 4:
    The Recon Boys fell at the start of the turn after the forest they were using for cover caught fire from the raging inferno and were forced to retreat near the Axis Zombies, who had very little trouble finishing off the defenseless unit. Johnny and Joe, with their respective units, were able to finish off the Axis Zombies and eliminate the remaining Laser Grenadier. The Recon Grenadiers and Beobacthers made their way toward the remaining Allied units. Angela has not been revealed yet.


  • Turn 5:
    Markus Charged into Johnny and his Gunner Rangers, who were able to wear the unit down with successful Reactive Fire, and resulted in the units eliminating each other when the Blutkreuz Apes finished their charge on the Allied unit. Once again it was down to Bazooka Joe and a lone Flamethrower to win the scenario!


  • Turn 6:
    The Recon Grenadiers made an unsuccessful attempt to move in and attack the remaining Allied unit, only to have a sustained Attack from Joe and the Flamethrower eliminate the Axis recon unit. The Beobacthers were still making their may towards the Allied unit, though much more cautiously than the Recon Grenadiers.


  • Turn 7:
    The Beobacthers decided that it was time to take a chance and charged in and attacked the Allied unit! Both Beobacthers hit with their weapons and the Allied unit failed both cover rolls. Once again the Axis win through elimination!!
Pretty much the same outcome as the previous game. Adding units didn't help to expand the experience all that much. Though it was still very fun to play and the action started immediately. It was also interesting to see that Angela and her Sniper Grenadiers never needed to reveal themselves and stayed hidden during the entire game.

What are some things we can try in the next play-test?
  • Point will be either 250 or 300 for each side.
  • Defender's deployment zones are changed to the map edge opposite the Attacking player's deployment zone. This will not include the building, only map edge spaces outside the structure.
  • The Defending player will not deploy the rest of his army in Turn 1. Instead the units will arrive either in Turn 2 or Turn 3. The Attacker will always be the initiating player in Turn 1, but if the Axis player wins the initiative for Turn 2, then they can deploy their remaining forces in that turn. Otherwise the Axis player must wait until Turn 3 to deploy their remaining units.
  • The Attacker can deploy up to 150 points of units in Turn 1. An additional 50 points are added each following turn to deploy the remaining Attacking forces until all units are deployed.
  • Victory Conditions:
    • Defender wins if they successfully protect the Structure.
    • Attacker wins if they destroy the Structure AND obtain more victory points.
    • Draw/Tie in the event the Attacker destroys the Structure and the Defender scores a higher VP total than the Attacker.
What do you think? Try this scenario out with your local gaming group and email us the results at pdxdusttactics@yahoo.com. What changes would you make? What do you like and what would you like to see changed?

A full on Warfare Battle Report is in the works and should be completed within a week. More games coming this weekend and a new League is underway! Stay tuned for further updates and Good Gaming!!